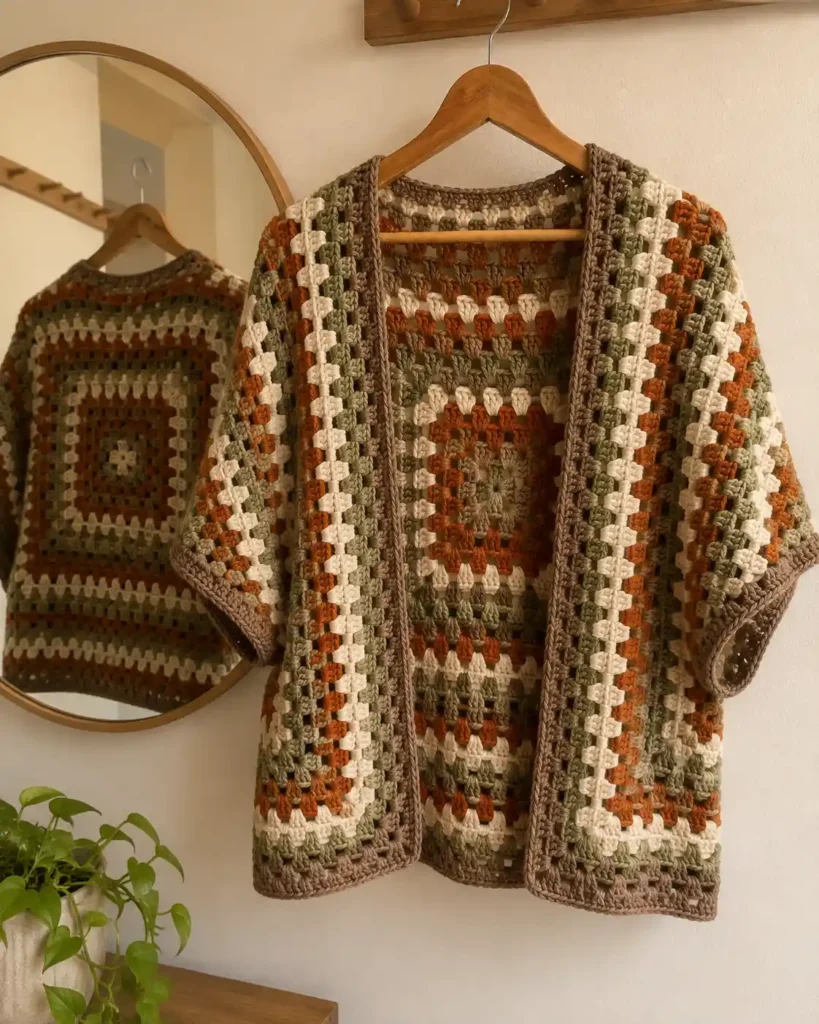
Some crochet garments look complicated even though their construction is surprisingly simple. This granny square cardigan free pattern begins as one large continuous granny square. Once the square reaches the correct measurement, it is folded and seamed along two short sections to create the sleeves.
There are no separate back panels, front panels, or shaped sleeves to crochet. The oversized square does most of the work, making this an approachable first wearable for anyone who already knows how to chain, slip stitch, and double crochet.
The original pattern is called the Continuous Granny Square Shrug and was designed by Michelle Greenberg of The Snugglery. It includes sizing from toddlers through 5XL and uses finished square measurements rather than a fixed number of rounds.
Prefer a printable copy? Download the complete PDF pattern here and keep the sizing chart beside you while you crochet.
Discover more free patterns and crochet inspiration on Crochet Rooms.
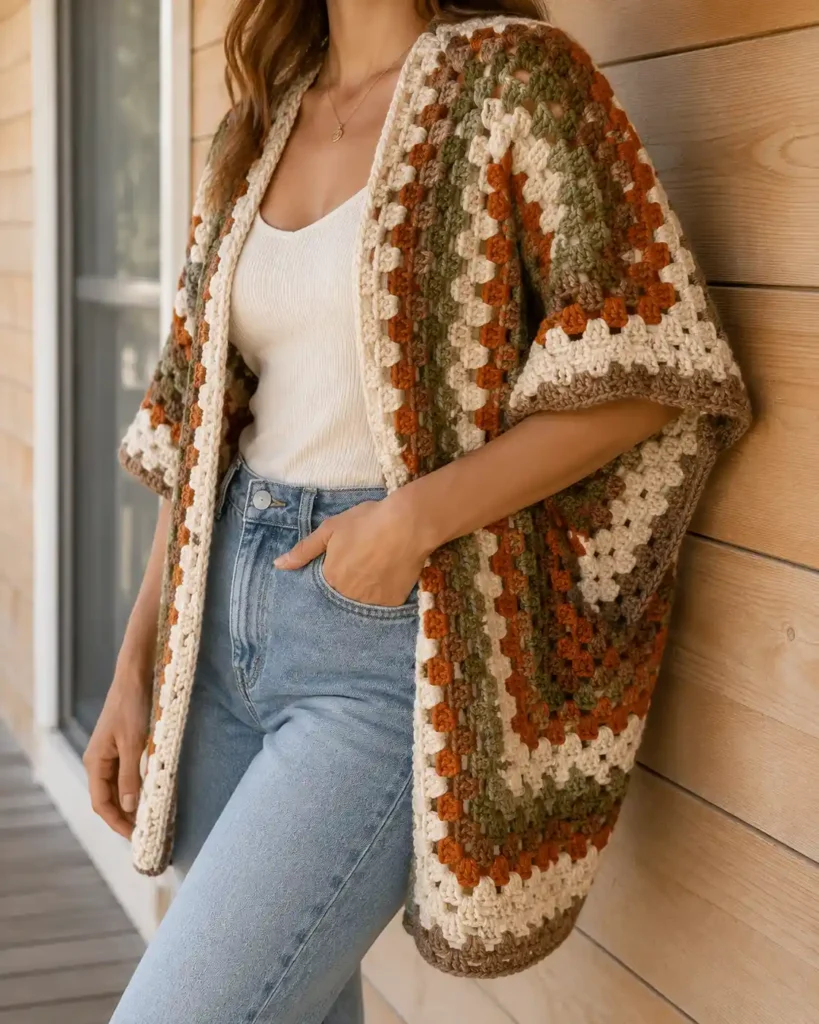
How This Granny Square Cardigan Is Constructed
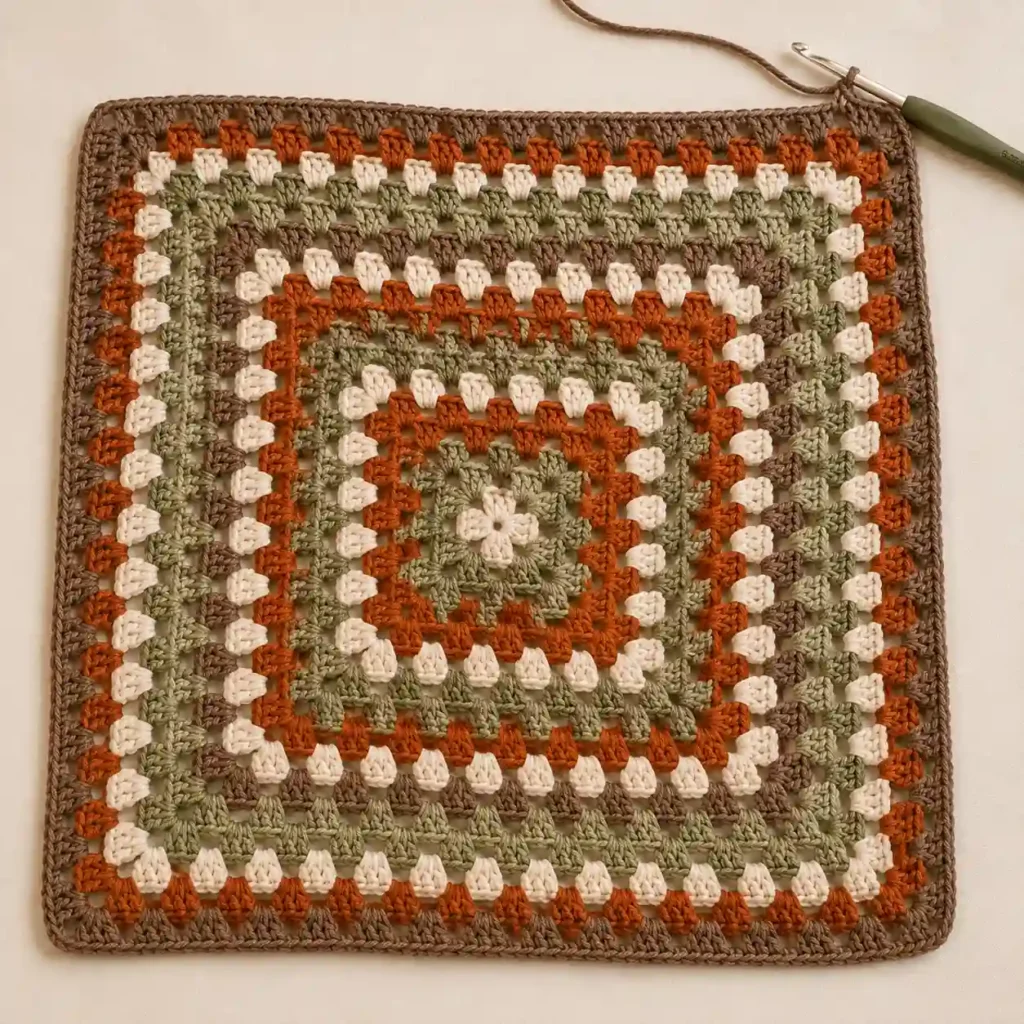
The cardigan begins in the center and grows outward in joined rounds. Each round contains double crochet clusters separated by chain spaces, with additional clusters worked into the four corners.
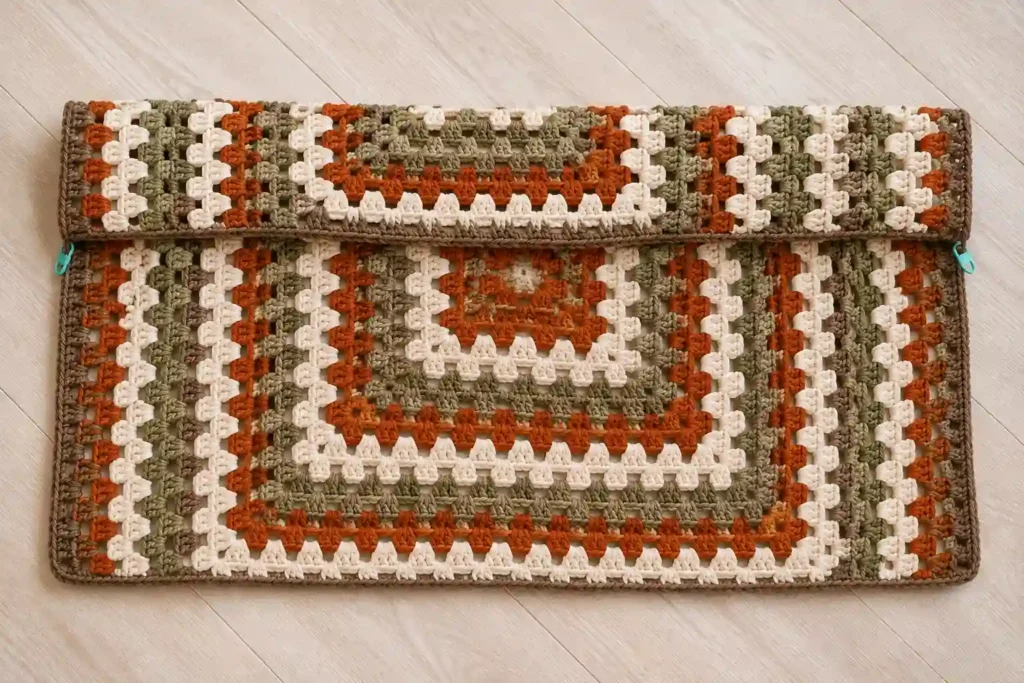
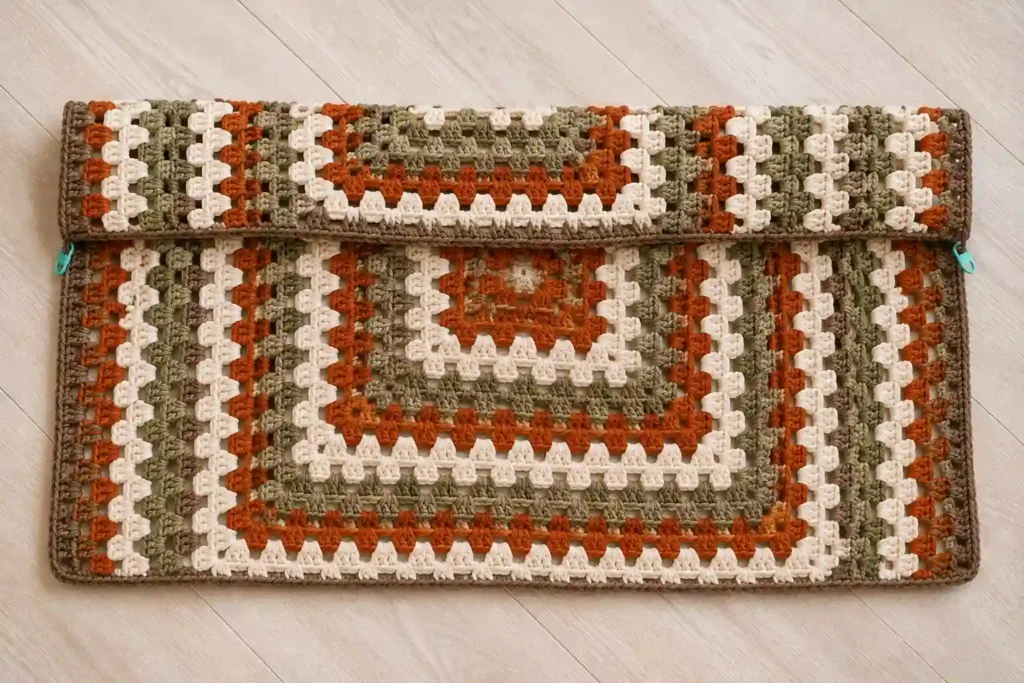
After reaching the square width listed for your size, fold the square in half. Short slip-stitch seams are then worked upward from both lower corners. These seams close part of each side while leaving an opening near the fold for each arm.
The result is an open-front shrug with a generous draped back and relaxed sleeves. The source pattern does not require separate sleeve, front, or back pieces.
Skill Level
Easy to confident beginner
This project is suitable for someone who can already:
- Make a foundation chain
- Work double crochet
- Work into chain spaces
- Join rounds with a slip stitch
- Recognize corners and side spaces
- Measure crochet accurately
- Make a basic slip-stitch seam
The stitch pattern repeats after the first two rounds, so the main challenge is keeping the corners correct and measuring the square regularly.
Materials
The original pattern uses:
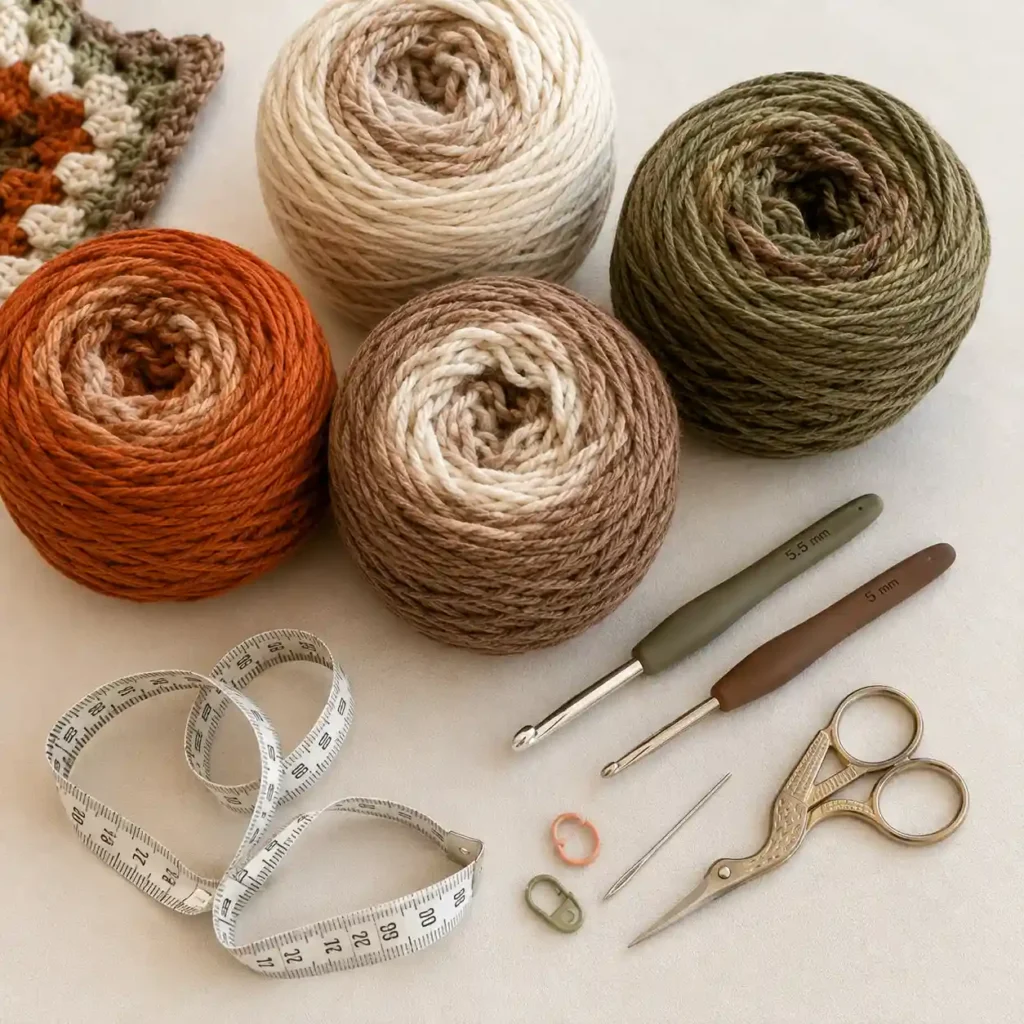
- Category 4 worsted-weight yarn
- 5.5 mm US I-9 crochet hook
The designer made the sample with original Caron Cakes, a color-changing worsted-weight yarn. The pattern also allows another yarn weight, provided that you crochet the square to the finished dimensions listed for your target size.
You will also need:
- Scissors
- Yarn needle
- Flexible measuring tape
- Stitch markers, optional
- A 5 mm hook for the gauge swatch described in the PDF
The PDF does not provide exact yardage. The amount needed will change significantly according to the selected size, yarn weight, tension, and desired square measurement. Purchase enough yarn from the same dye lot whenever you are using a solid color.
Category 4 is the Craft Yarn Council’s medium yarn category and includes yarns commonly described as worsted, Afghan, or Aran. Yarn within the same weight category can still differ in thickness, softness, and drape, so making a swatch remains important.
Gauge
The PDF lists the following gauge:
18 single crochet stitches and 24 rows = 4 × 4 inches or 10 × 10 cm, using a 5 mm crochet hook.
The main granny square is crocheted with a 5.5 mm hook, while the listed gauge swatch uses a 5 mm hook.
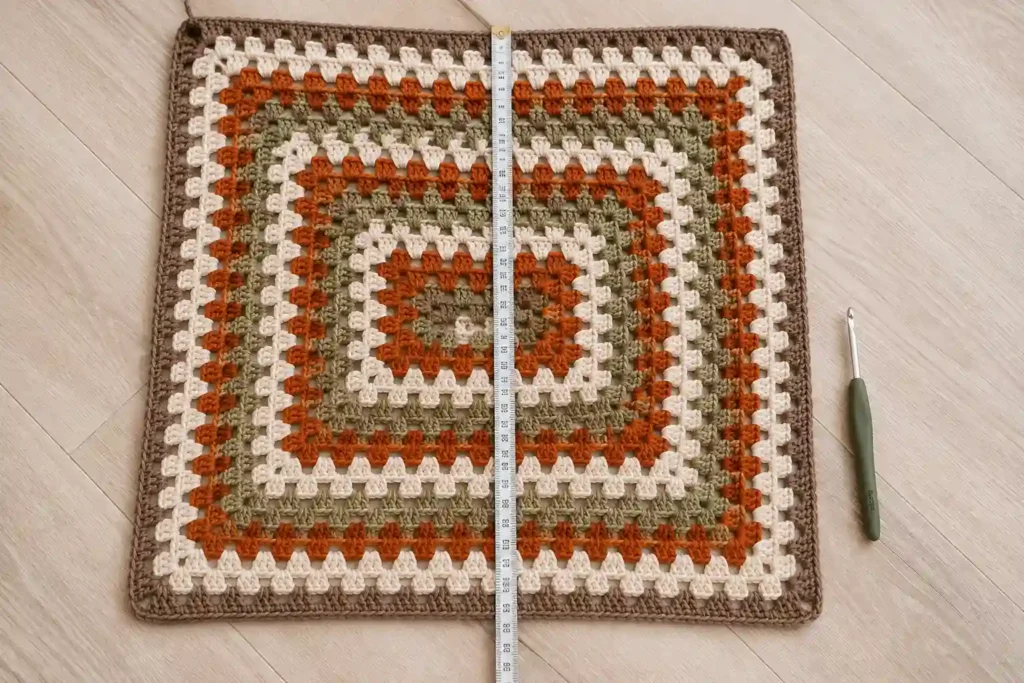
Because the cardigan is sized by the final width of the square, matching the exact gauge is less important than reaching the correct finished measurement. However, a swatch can still help you evaluate the fabric.
The granny stitch fabric should feel soft and flexible. A square that is too stiff may not drape comfortably around the shoulders, while very loose stitches may stretch considerably when the garment is worn.
Granny Square Cardigan Size Chart
Measure around the fullest part of the chest before choosing a size. Select the row with an “up to” chest measurement that is comfortably larger than the wearer’s actual measurement.
| Size | Finished Square Width | Fits Chest Up To | Seam From Each Bottom Corner |
|---|---|---|---|
| 2T–4T | 24 in / 61 cm | 26 in / 66 cm | 7 dc clusters |
| 6–9 Years | 28 in / 71 cm | 30 in / 76 cm | 8 dc clusters |
| XS–Medium | 34 in / 86 cm | 38 in / 97 cm | 10 dc clusters |
| Large–2XL | 40 in / 102 cm | 48 in / 122 cm | 12 dc clusters |
| 3XL–5XL | 45 in / 114 cm | 62 in / 158 cm | 14 dc clusters |
These measurements and seam counts come directly from the sizing chart on page four of the supplied pattern.
This is designed as a loose, open-front shrug rather than a fitted or buttoned cardigan. When choosing between two sizes, consider both the chest measurement and the amount of drape you prefer.
Crochet Abbreviations
This pattern uses US crochet terminology.
- ch: chain
- dc: double crochet
- sl st: slip stitch
- sp: space
- ch-1 sp: chain-one space
- ch-2 sp: chain-two corner space
- rnd: round
- rep: repeat
- st/sts: stitch or stitches
The Craft Yarn Council maintains a complete list of standard US crochet abbreviations, including ch, dc, sl st, rnd, rep, and sp. View the official crochet abbreviations guide.
Important Pattern Notes
The cardigan is made with one continuous granny square motif.
The chain five at the beginning of a round counts as one double crochet and a chain-two corner space.
The remaining two double crochets of the starting corner are worked at the end of the round. This allows the join to remain near a corner rather than moving across the side.
Join each round with a slip stitch into the third chain of the beginning chain five.
Do not rely on a fixed round count. Continue repeating the established round until the square reaches the measurement in the sizing chart.
Measure the square while it is lying flat and without stretching it.
Color changes are optional. A self-striping yarn creates changing bands automatically, but the cardigan can also be made in one solid shade or with manually changed colors.
For help with the basic stitch, add your tutorial here:
[INTERNAL LINK: How to Crochet the Double Crochet Stitch]
Continuous Granny Square Pattern
Foundation Ring
Chain 4.
Slip stitch into the first chain to form a small ring. Make sure the chain is not twisted.
Round 1
Chain 5. This counts as the first double crochet and the first chain-two corner.
Work 3 dc into the center of the chain-four ring, then ch 2.
Repeat the following sequence two more times:
3 dc into the ring, ch 2.
Work 2 more dc into the ring.
Join with a sl st into the third chain of the beginning ch 5.
You should now have four double crochet clusters and four chain-two corner spaces.
Round 2
Slip stitch into the first chain-two corner space.
Chain 5.
Work 3 dc into the same corner space.
Chain 1.
In the next chain-two corner space, work:
3 dc, ch 2, 3 dc.
Chain 1.
Repeat the same corner sequence in each of the next two chain-two spaces:
3 dc, ch 2, 3 dc, ch 1.
When you return to the starting corner, work 2 dc into the same space that contains the beginning chain and first cluster.
Join with a sl st into the third chain of the beginning ch 5.
The beginning chain and final two double crochets complete the fourth corner.
Round 3
Slip stitch into the first corner space.
Chain 5 and work 3 dc into the same corner space.
Chain 1.
Work 3 dc, ch 1 into the next chain-one side space.
In the next chain-two corner space, work:
3 dc, ch 2, 3 dc, ch 1.
Continue around the square by working:
- 3 dc, ch 1 in every chain-one side space
- 3 dc, ch 2, 3 dc, ch 1 in every chain-two corner space
When you return to the starting corner, work 2 dc into that corner space.
Join with a sl st into the third chain of the beginning ch 5.
Round 4 and All Following Rounds
Repeat the structure established in Round 3.
Each new round adds one more double crochet cluster along every side.
Work one granny cluster into each chain-one side space. In every chain-two corner space, work two granny clusters separated by two chains.
Continue until the square reaches the finished width listed for your chosen size. The PDF instructs the crocheter to repeat the third-round structure until the target measurement is reached.
Changing Yarn Colors
When changing colors manually, complete the final yarn-over of the last slip stitch with the new color.
Cut the previous yarn, leaving a tail long enough to weave in securely. Continue the following round with the new color.
For clean stripes, change color only at the end of a completed round. Changing halfway through a round creates a more playful patchwork effect but makes the color transition less symmetrical.
Weave yarn ends beneath stitches of the same color whenever possible so they remain less visible through the open granny stitch fabric.
How to Seam the Granny Square Cardigan
Once the square reaches the required measurement, fasten off and weave in any loose yarn ends.
Lay the square flat and decide which side you want to show on the outside of the cardigan. The source pattern does not require a specific side to face outward.
Fold the square in half so the top two corners meet the bottom two corners. The fold becomes the upper edge across the shoulders and sleeves.
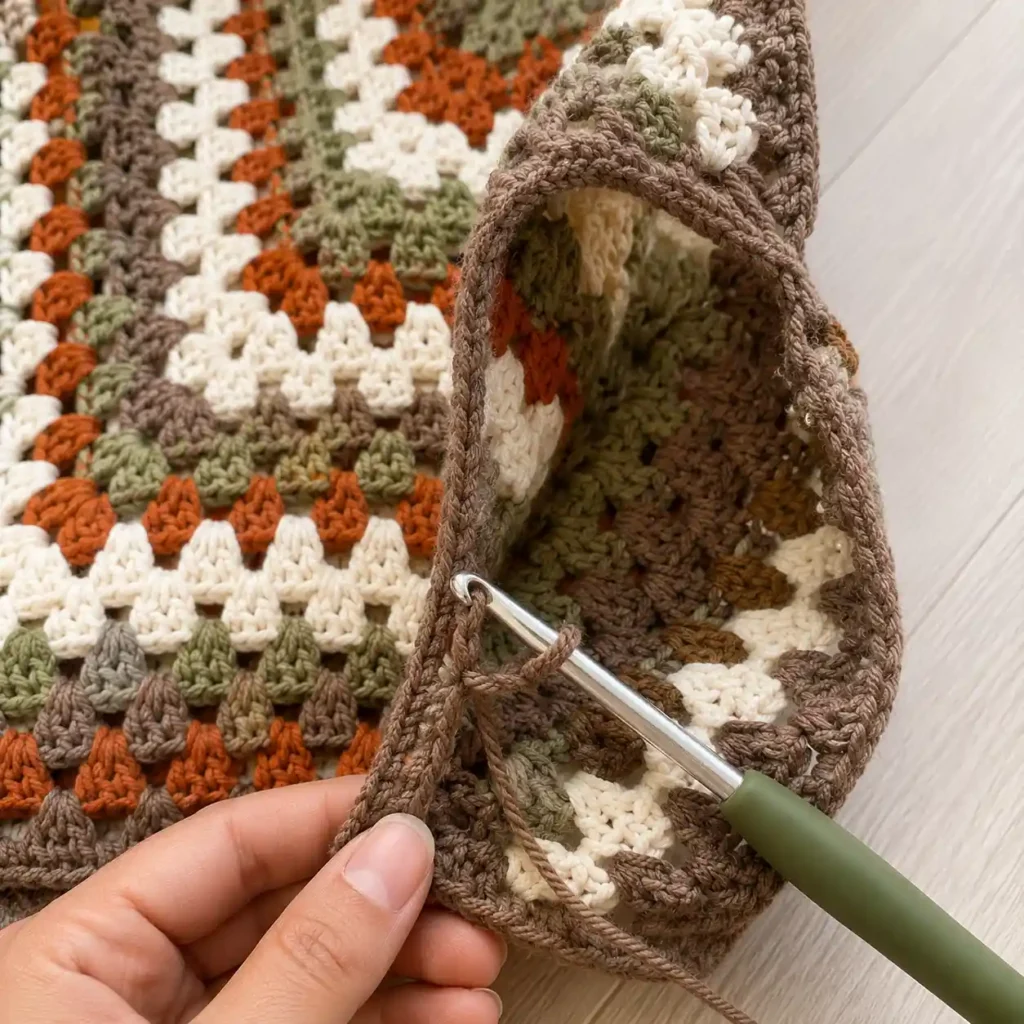
Starting at one bottom corner, join the yarn through both layers.
Slip stitch through the corresponding edge stitches or spaces, working upward toward the folded edge.
Stop after joining the number of double crochet clusters listed for your size:
- 7 clusters for 2T–4T
- 8 clusters for 6–9 years
- 10 clusters for XS–Medium
- 12 clusters for Large–2XL
- 14 clusters for 3XL–5XL
Fasten off and repeat the same seam from the opposite bottom corner.
The unseamed areas near the fold become the two arm openings. Page five of the PDF illustrates the square folded horizontally with matching short seams rising from both lower corners.
Try On the Cardigan Before Securing the Seams
Before hiding the seaming tails permanently, try on the cardigan carefully.
The arm openings should feel comfortable without pulling under the arms. The back should drape naturally, and both front edges should hang at approximately the same level.
When an armhole feels too small, remove one or two seamed clusters from each side. When it feels excessively large, extend both seams evenly.
Any adjustment made on one side should also be made on the other so the cardigan remains balanced.
Optional Finishing Border
The original PDF finishes the garment after seaming and does not include a separate border, cuff, or collar.
For a cleaner edge, you may optionally join yarn anywhere around the large front opening and work one round of single crochet or half double crochet.
Keep the stitches relaxed, especially around the lower back and neck. A border worked too tightly can pull the opening inward and change the cardigan’s drape.
You may also add a simple round around each sleeve opening. Treat these borders as optional customization rather than part of the original pattern.
Blocking and Finishing
Weave in every remaining end with a yarn needle.
Lay the cardigan flat and gently shape the corners, sleeve openings, and front edges.
Check the care instructions on the yarn label before wet blocking or steaming. Some fibers tolerate heat poorly, so never place a hot iron directly against the crochet fabric.
Allow the garment to dry completely before wearing or storing it.
Ways to Customize Your Granny Square Cardigan
A solid neutral color gives the cardigan a simple, modern appearance, while self-striping yarn creates bands without requiring frequent color changes.
For a vintage look, alternate mustard, olive, rust, cream, and brown. For a softer result, try dusty pink, oatmeal, muted lavender, and sage.
You can also use a different yarn weight. The designer specifically notes that another yarn weight can be used as long as the completed square reaches the correct size from the chart.
A finer yarn will usually require more rounds to reach the measurement, while a thicker yarn will require fewer. The finished fabric and overall weight will also change, so check the drape before committing to a large square.
Browse another wearable crochet project here:
[INTERNAL LINK: Free Crochet Wearable Patterns]
Common Mistakes to Avoid
Missing a Chain-One Side Space
Every chain-one space along a side needs one group of three double crochets. Skipping a space can pull the edge inward and make the square uneven.
Forgetting the Chain-Two Corner
The two chains at each corner create enough room for the square to turn. Replacing them with a chain one may cause the corners to curl.
Adding Clusters Between Spaces
Granny clusters are worked into the chain spaces, not into the tops of individual double crochet stitches.
Measuring While the Square Is Stretched
Lay the square flat and let the yarn relax before measuring. Stretching it can result in a cardigan that is smaller than expected after washing.
Seaming the Entire Side
Only seam the number of clusters stated for your size. The remaining section near the fold must stay open to create an armhole.
Making Uneven Side Seams
Count the clusters carefully and use the same seam length on both sides.
Frequently Asked Questions
Is this a cardigan or a shrug?
The source pattern calls the garment a Continuous Granny Square Shrug. It can also be described as an open-front granny square cardigan because it is worn around the back, shoulders, and arms like a relaxed cardigan.
Is this pattern suitable for beginners?
It is suitable for an adventurous beginner who is comfortable with double crochet and joined rounds. After the first two rounds, the granny square follows a predictable repeating structure.
How many granny squares are required?
Only one. This cardigan is constructed from one large continuous granny square rather than multiple small motifs.
How much yarn do I need?
The supplied PDF does not list yardage. The amount will depend on the size, yarn weight, hook, tension, and color arrangement.
Can I use DK or bulky yarn?
Yes. The source permits another yarn weight as long as the square is crocheted to the target finished measurement. Always check the fabric’s weight and drape before completing the entire garment.
Do I need to match the gauge exactly?
Reaching the correct square width is the primary sizing method. A gauge swatch remains useful for checking the fabric and estimating how your yarn behaves.
Why does the gauge use a different hook?
The PDF lists a 5.5 mm hook for the project and describes the gauge as 18 stitches by 24 rows in single crochet with a 5 mm hook.
Can I make the cardigan longer?
A larger square creates more overall length and drape, but it also changes the sleeve depth and fit. Measure carefully and test the folded square around the body before going significantly beyond the recommended dimensions.
Can I add long sleeves?
The source pattern does not include long sleeve instructions. Sleeves could be added as a separate customization, but their shaping and stitch counts would need to be developed according to the armhole size.
Can finished cardigans be sold?
Yes. The designer states that makers may sell items they crochet using the pattern. Credit to the original designer is a respectful addition when listing the finished garment.
Final Thoughts
This granny square cardigan free pattern proves that a wearable project does not always need complicated shaping. One repeating square, two short seams, and a little finishing are enough to create a relaxed cardigan that can be customized with different colors, yarn weights, and sizes.
Take time to measure the square accurately, count both seams, and check the fit before weaving in the final ends. Those small steps will help the cardigan hang evenly and feel comfortable when worn.
Find more free crochet tutorials, wearables, and handmade project inspiration on Crochet Rooms.