Blankets

 Get the Free Printable PDF Pattern
Join the CrochetRooms newsletter and we’ll email you the printable PDF version of this pattern.
Table of Contents
You have a basket of granny squares and a big decision to make. The squares are the easy part; what turns them from a pile of motifs into a blanket you love is the granny square blanket layout. The way you arrange and join your squares decides everything: the size, the color rhythm, and whether the finished throw lies flat or ripples like a flag.
A thoughtful granny square blanket layout is the difference between a blanket that looks intentional and one that looks like a random patchwork accident. A little math up front saves a lot of frogging later.
The classic grid is exactly what it sounds like: squares arranged in neat rows and columns, like tiles. It is the most forgiving granny square blanket layout because every square gets the same neighbors, and the color planning is simple. Work a repeating color sequence across each row, shift it by one square on the next row, and you get a balanced checkerboard effect with zero headaches.
Grid sizes follow easy math. A 5 by 6 grid gives 30 squares, an 8 by 10 grid gives 80, and a 10 by 12 grid gives 120. If your squares measure 5 inches across, that 8 by 10 grid becomes a 40 by 50 inch throw before the border. Write your target size down first, measure one finished square, and divide.

If you want your blanket to look like more than the sum of its squares, try a diagonal granny square blanket layout. Instead of lining squares up edge to edge, you arrange them on point, turning each square 45 degrees so they form diamond rows, and fill the zigzag edges with half-square triangles. It takes a little more planning, and the triangle fillers mean extra pieces, but the result looks genuinely high-end.
Strip layouts are the friendlier cousin: join your squares into long vertical or horizontal strips, then join the strips together. Working strip by strip keeps a big blanket portable, and color-blocked strips look strikingly modern. Or try framed blocks: join squares in groups of four, work one round of single crochet around each block in a solid color, then join the blocks for a quilt-like design. The lovely folks at Stouto Crochet show how planning colors and yarn per square before you start keeps even a complex layout balanced.
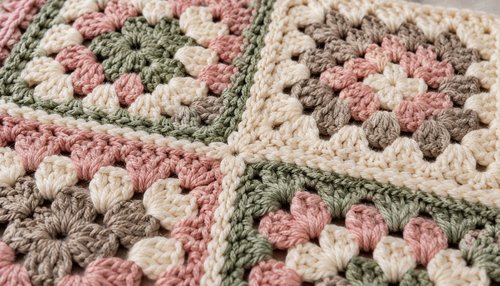
How you join matters as much as how you arrange. The invisible whipstitch join gives the flattest, most seamless look, and it is the best choice when your squares have busy colors that you do not want interrupted. A slip stitch join through the back loops creates a raised ridge that frames each square like a picture frame, lovely for simple solid squares. When you are still finalizing your granny square blanket layout, pick the join that matches your colors: busy squares love the invisible join, simple squares love the ridge.
The flat braid and 3-double-crochet joins add decorative texture along every seam, turning the joining itself into a design feature. Whichever you choose, keep your tension even and match stitch for stitch along each edge. Join your squares into strips first, then join the strips: long seams stay straighter that way. And block your squares before joining. Even five minutes of blocking per square makes the final granny square blanket layout lie noticeably flatter.
Here is the practical part of any granny square blanket layout. First, crochet one complete square and measure it after blocking. Divide your target blanket width by the square size to get squares across, and the length by the square size to get squares down. Multiply for your total. A small throw of 40 by 48 inches with 5-inch squares needs an 8 by 10 grid: 80 squares.
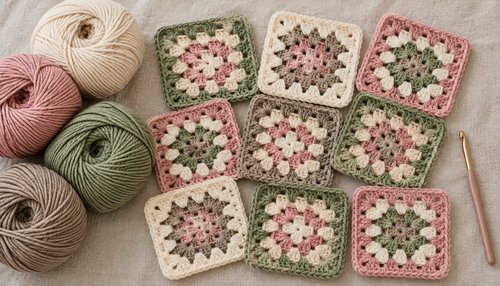
For color planning, lay all your finished squares on a bed or the floor before joining a single seam. Shuffle them until no two identical colors touch, spread the bold colors evenly so they do not cluster, then take a photo of the arrangement before you start seaming. That photo is your map. Browse our Blankets collection for throw-size inspiration, check all our patterns for companion projects, and peek at our granny square jacket to see the same motif magic in a wearable.
Want the full granny square blanket layout plan in one place? Our free PDF includes the original 4-round granny square pattern plus a complete joining and layout guide: square math for four blanket sizes, color-planning tips, joining instructions, and a border that pulls it all together. It is free for our newsletter subscribers. Just use the signup box at the top of this article.
It depends on your square size and target blanket size. With 5-inch squares, an 8 by 10 grid (80 squares) makes a 40 by 50 inch throw, and a 10 by 12 grid (120 squares) makes a 50 by 60 inch large throw. Measure one square, then divide your target dimensions by it.
The whipstitch join is the most invisible and the flattest. The slip stitch join adds a decorative raised ridge. The 3-double-crochet join makes a textured cable-like seam. All three work well; pick based on the look you want.
Yes. Blocking evens out every square to the same size, which makes joining dramatically easier and keeps the finished blanket flat. Even a quick steam or mist-and-pin session makes a visible difference.
Plan a color repeat instead of grabbing squares at random. Assign each square a color position in advance, lay everything out on a flat surface, and photograph the arrangement before joining. Balanced color distribution is what makes a layout look intentional.
Yes, the join-as-you-go method connects each square to its neighbors with the final round, so there is no separate seaming step. It is efficient, but you must commit to your granny square blanket layout early, so photograph it first.
A throw of 80 five-inch squares in worsted weight uses roughly 1,900 to 2,200 yards, including joining and a border. Buy one extra skein per color; dye lots vary and running out mid-blanket is miserable.